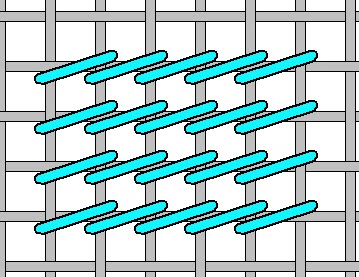
For may needlepointers, the half cross tent stitch was the very first stitch they learned for needlepoint. It belongs to the big tent stitch family, and is thus closely related to stitches such as the Continental tent stitch and the Baskeweave tent stitch.
It is absolutely possible to do entire needlepoint projects using half-cross tent stitch only, but combining it with other stitches is also common. Among advanced needlepointers, the half-cross tent stitch is often selected for small areas of a design where larger stitches would be difficult to fit in.
How to do it
- The basic half-cross tent stitch is always worked in rows running from left to right and diagonally from bottom left to top right for each stitch.
- Use a tapestry needle

- Start at the left side of the area that is to be stitched. Bring the threaded needle up from the back of the canvas at A. Go diagonally down again into the back at B. Come up again at C and go down again at D. Continue across the row until you reach the right-hand side of the design area.
- Now, you can turn your canvas around and repeat the entire sequence, starting at A and stitching across the entire row.Another option is to not turn the canvas and work the stitch from right to left alternately until you reach the end of the row.
- Work additional row as needed until you have completed the design area.
Pro’s & Con’s of the Half Cross Tent stitch
Pro: Very easy to learn
Pro: Doesn’t use up much yarn
Con: Poor coverage and uneven appearance at both the front and the back of the canvas. When held up to the light, spots of light will peak through.
Con: The thread does not fully cover all canvas mesh threads on the reserve side.
Con: The half-cross tent stitch is not suitable for working large pattern area on mono needlepoint canvas, because it can easily pull the mesh threads out of shape and create uneven stitching tension. It is unsuitable for larger design areas unless you use interlock or Penelope canvas with reinforced or double mesh threads.
